When I started blogging I really had no idea that you can create a mini-course for free and start making money. Even if you do not own a blog you can still earn money online. Many bloggers do it.
There are many passive income streams like doing affiliate marketing, selling digital products, youtube videos and many as such. Creating an E-course just being one of them.
You can create an e-course all by yourself and connect it to Paypal or any other custom gateways in your own hosting.
I would always prefer to publish my e-course on other hosting platforms which will make my payment easy to collect and also not to worry about the designing part of my e-course.
Teachable is one such online learning platforms which give an incredible support in building a course beautifully and also make our payments hassle-free.
The other online learning platforms are like Udemy, Khan Academy, Skillshare, Code Academy for an example.
WHAT IS TEACHABLE?
Teachable is one of the online teaching sites and with teachable you can create some best online courses.
Features of Teachable
With teachable, you can create multimedia lectures adding video, image, PDF, audio files easily importing directly from DropBox, Google Drive or OneDrive.
Your E-course created from Teachable is fully responsive so your students can view it computers, tablets or smartphones.
You can make powerful and attractive sales pages which convert.
To support international students you can even modify the language.
Pricing

As you can see the basic plan starts with $39. But you can also create a FREE account with teachable.
You can sign up for a teachable Free account here.
LET’S CHECK HOW TO CREATE ONLINE COURSE WITH A FREE TEACHABLE ACCOUNT
1. First of all, you need to sign up with the link given above.
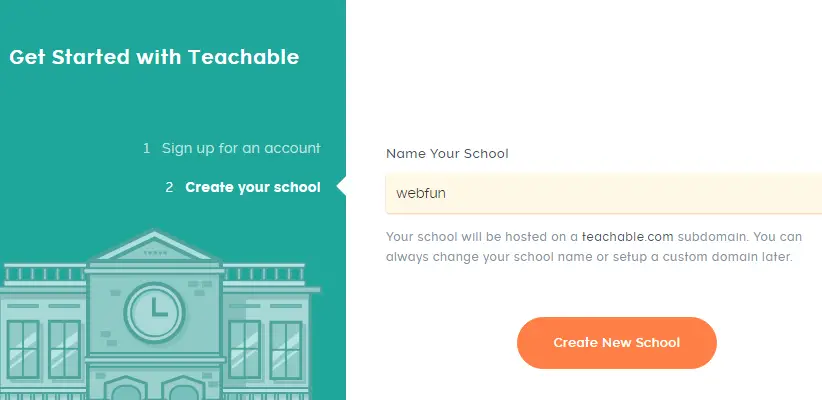
2. You need to name your school> Create New School
It is always advisable to put the teachable school name as your own website name. Am using here webfun (as a demo) as I already have my school as coolwebfun.

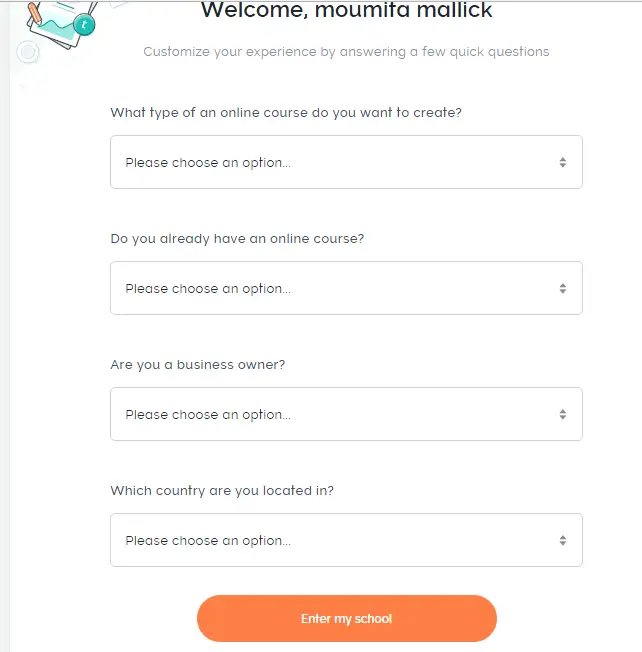
3. You can skip and continue or else fill this short form and enter your school.

4. Confirm your email ID.
![]()
5. Go to Create a Course

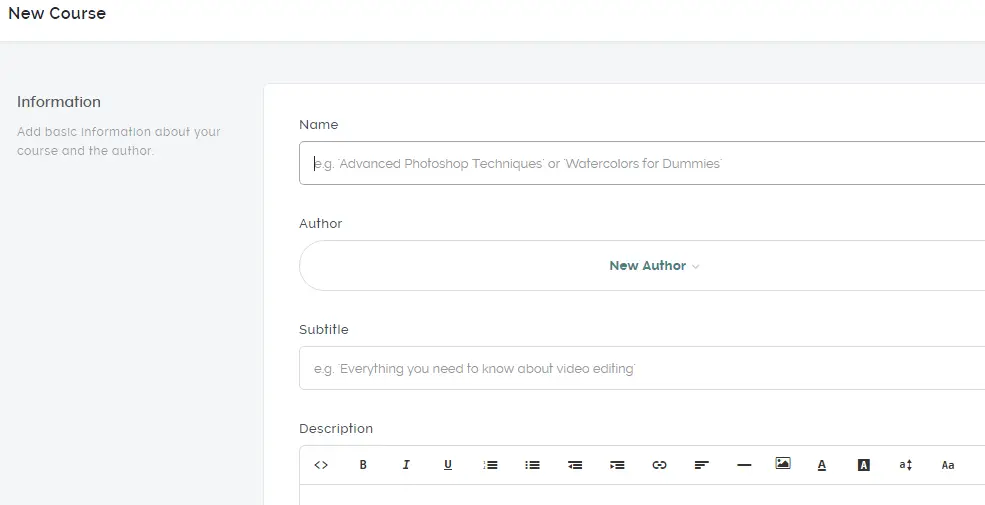
6. You need to name your course. I have named as ‘SEO for Beginners‘.
For a subtitle, I have written ‘To rank blog posts in search engines’.

7. Click on to new author and add your details.
Just an example

8. Once your name of the course and Author description is filled you can now create your course.
 9. After creating course this is what it will look like.

10. Edit the First Section and put your Course first module name.
I am putting Demo section 1 just to explain it.

11. Click on the new lecture to create your second lecture and so on.
 This is how sections and lectures look like.
12. Let us create our first lecture.
Click on Demo Lecture 1

Click Add File.
You can add any PDF file, Audio/ Video, Excel sheet, Word Document.
Add Text
Here you can pretty much write anything.
You can get all the options from adding a link, image to changing font size and family.

Over here a bit difficulty which I faced is changing the text color.
By clicking on change font color you will get only a set of option which means you can not put your brand color if you have any.
So what you need to do is first select the text for which you want to change the font color. Then select any color which is on the palette.

Now click on HTML tab.

Here you can put the RGB color of your choice.

Click on the HTML tab once more to go back to the Text mode.
SETTING UP OF SALES PAGE
Before we start with your sales page I would want you to have a look at your course information.
Click on your dashboard and then into your course.

Here you will get the option information.

Earlier we have already set up the details for Name, Author, Subtitles.
Now we will look into the SEO of it.

Here if you wish you change your course URL and meta description.
If you do not know much about SEO then I would strongly recommend this SEO course which is Free.
The next comes the Branding part.
You need to set a thumbnail which will appear if you are doing any Facebook promotion or any other promotion.
This is my thumbnail. Just to make it clear what my course is all about.

The recommended format and size are given so you can create some beautiful image using Canva.
The next is the featured background. This is what my featured image looks like.

Also, check out the site.

Here you can change your theme, edit your author block, change the custom texts.
You can also add site logo or upload any favicon.

Let’s start with the sales page
On the left bottom, you will find the option Sales Page

You will find options like coupon banner, course description, course page closing letter, course curriculum and others.
Delete the blocks which you will not need or so not want to show.

Next, you will find insert new block.
Here you can include rich text, include an HTML block, embed a video.

If you click on the dot markings, you will get some more utility blocks.

As you can see here you can include pretty much everything as primary enroll button, embedded form and what not.
After saving you can preview your sales page before publishing.
SETTING UP OF PRICING
Just below information tab, you will find the pricing tab.


As we can see here is a free plan, the subscription method like annual or monthly subscription, then one-time purchase (the most popular one) and also the installment payments plan.
As we are here to check how to earn money by creating a course online then definitely we should be checking the One-time purchase.
The pricing totally depends on your course market value. Have a thorough research like what are the average pricing of ‘your type of courses’.

That is it. You can always delete and create new pricing plan whenever required.

HOW TO COLLECT PAYMENT FROM TEACHABLE
Now when you have set your pricing, you need a way to collect your payment.
Go to Settings> Payments

You can either use the teachable gateway or can create custom gateways.

But sadly custom gateways are only available from Basic plans and above.
But here we are on the free teachable account, so what you can do is put your PayPal address and you will receive your payments directly on your PayPal.

If you do not have a PayPal account then setup PayPal business accounts for free.
NOW, HOW TO MARKET YOUR BUSINESS OR BLOG?
When your course is ready, payment method is ready, the only thing you are left with is promoting your course. Without promotion, you can never meet your goals.
For promoting your course successfully on Pinterest I would really like you to check Scrivs Billionaire Blog club. It is much much more worth the price. I wish I would have come to his community when I just started. BBC is not only about promoting your product. It is about the whole blogging journey with help from Scrivs and other members.
I had spent on several blogging courses. Some did not burn a hole in the pocket while some did. In fact, earlier I had made a list of 2-3 courses which I would have like to buy when my blog earns well. But after I joined BBC my whole perception about blogging changed (I do not need any more courses). I cannot thank him and his slack community enough to make my blog successful.
BBC has everything you can ever need in a blogging journey. Starting from SEO, WordPress, google analytics to Pinterest marketing, course creation, email marketing.
Trust me the slack community will make you feel as if you are working with co-workers and you will never ever really need any other blogging courses. If you are a newbie, this is the best thing you can do for your blog.
He offers a free 12-day blog camp which is even filled with so and so much of information.
Start the Free 12 Day Blogging Bootcamp
Apart from that, You can check how to get traffic WITHOUT the use of social media.
Another FREE course you can check which consists of FB group lists of over 2,70,000 members along with their schedules to promote blog posts and Pinterest Pins.
Another book which I can recommend is Pinteresting strategies. It is a book for only 32$. And it is definitely better than many of the courses which are priced over 200$. If it was not that good then I would not be affiliating it for a commission percentage of 32$.
Check out Pinteresting Strategies which have changed many bloggers life by attracting tons of Pinterest Traffic.
HOW TO GET HONEST & TRUE REVIEWS?
Okay, now the last part. You really need to have some honest feedback from fellow bloggers as some social proof.
You can get some true reviews by offering your course free for the first 20 students. Yes half of them will not give you the honest reviews even after asking. But the other 50% will.
These reviews are really required as social proof as it is way better if someone has truly loved your course other than you yourself saying it.
Put at least 5-7 reviews on your sales page.
THINGS TO KEEP IN MIND
Think of something which you know well.
Brainstorm as many as online course ideas you can. Then create a course which can actually help people.
Here is the link to create the free teachable account.
By creating some sugar-coated sales page you cannot go on the long run.
Once you have created something valuable then it will get a lot of attention in due time.
This post contains some affiliate links which means I would receive a small commission if you buy without any extra cost added to you.


Nadia
Friday 21st of December 2018
Hi there, you said that to set an account is free. Would that set up require a subscription after the initial 14-days free trail? Thanks
Moumita
Friday 21st of December 2018
Hi Nadia, I am still having my account free with 3 published courses and it's a year old now. So the free account is always free until you upgrade it.
Technology Unfold
Thursday 20th of December 2018
I was suggested this blog by means of my cousin. I am no longer certain whether or not this publish is written by him as nobody else understand such detailed about my trouble. You aare wonderful! Thanks!
ANNE OBARA
Tuesday 29th of May 2018
Hey Moumita. Thanks so much for sharing this. I have participated in various webinars teachable has hosted however you explained process very clearly.
Can I launch my course without a blog or website? How would that look like.
Moumita
Tuesday 29th of May 2018
Hi Anna,
Definitely, you can launch your course without any blog but it is hard for marketing then. If you already have your audience then it is fine. Else how would you drive traffic to your course without any blog posts?
Jena | Rooms Need Love
Monday 4th of December 2017
Thank you so much for this! I have been putting off trying to figure this out, and you’ve done all the work for me! Thank you! Thank you! Thank you!
Moumita
Monday 4th of December 2017
Hey Jena I am so glad that it helped you